Sunday 5 October 2014

Royal Icing Rose Cookies


My nice who is probably my biggest fan complained that I have been lazy and didn't bake anything new recently! Hmm…so no excuses I had to catch up! And as I am not a royal icing expert I thought this was a great opportunity to practice my skills! That is how this beautiful rose cookies have been created! I used the wet-on-wet technique with is very easy to do even if you are a beginner. You can create many patterns from marbling cookies to this beautiful roses! Hope you like them :)

Ingredients:
For the cookies: 
makes 10-15 large or 25-30 medium
  • 250g butter
  • 250g sugar
  • 1 egg (if you are not planning to do royal icing use 2 eggs)
  • 1 yolk (keep the egg white for your royal icing)
  • 1 package of vanilla sugar (16g)
  • 400g flour
For the Royal Icing:
  • 1 egg white
  • 250g powder sugar
  • vanilla extract - optional
  • food coloring
Preparation:
For the cookies: In a bowl of an electric mixer beet the butter and sugars together until creamy and fluffy. Ad the egg and the yolk and mix until all combines. Now add the flour in few stages and mix until all ingredients come together. Take your dough out of the bowl and cover with clingfilm and refrigerate at least for 30min.
Take your dough out of the fridge, sprinkle some flour on the work surface and roll out the cookie dough to about 5mm thick. 
Using cookie cutters cut your cookie shapes and place them on baking trays lines with baking paper. Return to the refrigerator to rest again for at least 30 min. 
Preheat the oven at 180C for about 10min. 
Bake the cookies for about 15min, depending on their size or until they get a nice golden brown color. 
Leave them to cool down completely before decorating them with royal icing or storing them. 
For the royal icing: Sift the powder sugar into a mixing bowl of an electric mixer, add the egg white and mix together for about 10min. Until the icing has reached a stiff-peak consistency (which is what you would need for sticking on decorations and gluing cakes together). But we now need a thinner consistency of icing in order to be able to create this beautiful roses. You will have to add some water to the icing but do this step by step. To get the best consistency I have used the 10 seconds rule - you can find may tutorials on royal icing. Once you are happy with your icing consistency color your icing using eatable food colorings. Pour the icing into the piping bags and start from outlining around the edge of each cookie - I used white icing. Then with the same icing flood inside the outlines on the cookies. Immediately before the icing starts to dry put some dots on the icing and with a toothpick make some swirls or zig-zags to get different designs. Hope you enjoyed!!! 


Sunday 24 August 2014

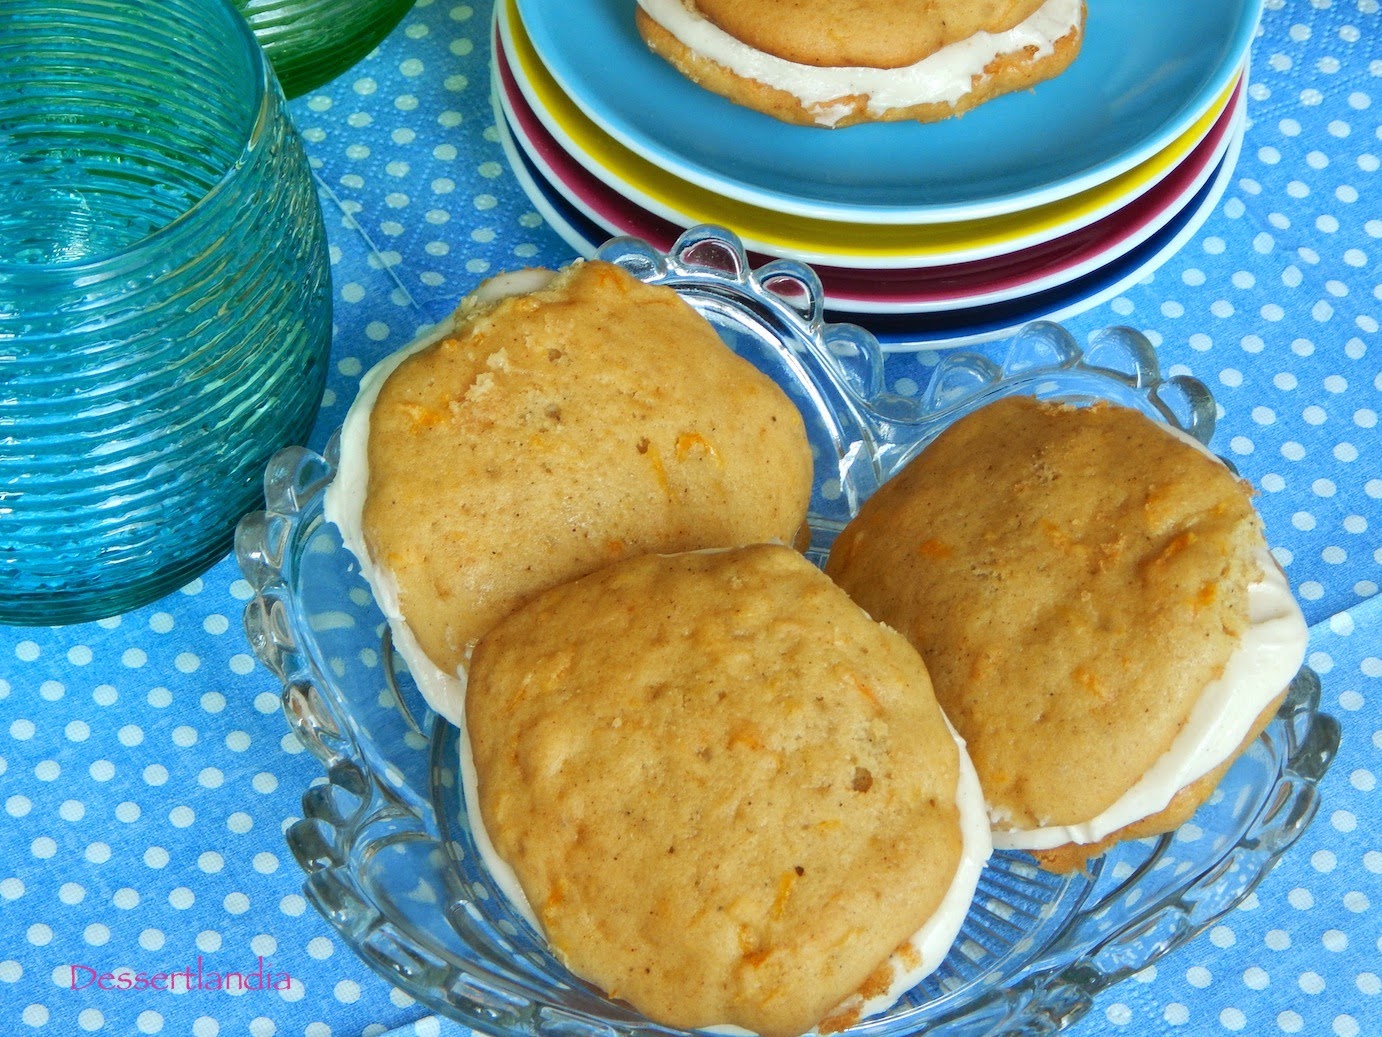
Carrot Cake Whoopie-Pies


I have never baked any whoopie-pies before but heard so many delicious comments about them that I had to try myself! I have chosen this carrot version so everybody who loves carrot cake will definitely go crazy for this small treats! They are moist, soft, aromatic and the marshmallow filling makes them to die for!!!! You must try!!

Ingredients:
makes 8-10 pieces
  • 1 egg
  • 150g sugar
  • 2 packages of vanilla sugar (16g each)
  • 125ml yoghurt
  • 25ml milk
  • 75g butter, softened
  • 275g flour
  • 1/2 teaspoon cinnamon
  • 1/2 teaspoon ginger
  • 1/2 teaspoon nutmeg
  • 1/4 teaspoon back powder
  • 3/4 teaspoon baking soda
  • 100g grated carrot
Filling:
  • 170g soft butter
  • 280g icing sugar
  • 1/2 teaspoon cinnamon
  • 220g marshmallow fluff
Preparation:
In a mixing bowl mix together, egg, sugar and vanilla sugar. When all the ingredients combine add yoghurt and milk and whisk all together, add the soft butter and whisk until all combines. 
To another mixing bowl pour flour, cinnamon, nutmeg and ginger, backing powder and backing soda and whisk all together. Then pour a half of the flour mixture into the egg mixture and combine all ingredients, next pour the rest of the flour mixture and whisk again until all combines. Take the grated carrot into your hands and press out the juice, next pour the carrot into the paste and whisk to combine.
Now put the mixture into the fridge for approx 30min to rest.
Preheat the owen to 175°C.
Take out from the fridge and with a spoon form 16-20 round small heaps (approx 3-5cm diameter) keeping 2-3cm distance from each other. Bake for 10-13 minutes until the cakes get a nice golden color. 
In the mean time prepare the filling:  In a mixing bowl mix butter, icing sugar, cinnamon until they get fluffy, now add the marshmallow fluff and whisk until everything combines. Put the filling into the fridge for the next 30minutes. 
When your pies are cool spread one spoon of the filling on one half of the pies, take the other half and press gently together. Enjoy!!!!! 


Sunday 17 August 2014

Forget Me Not Vanilla Mini Cupcakes


This was a special evening for me! My lovely auntie was celebrating her Bday and I was in charge to prepare the seating cards so I thought I will prepare mini cupcakes which will hold the names of the guests. As it was an unforgettable evening the cupcakes had to be decorated with small forget me not flowers :) I think they turned out very sweet and the guests were happy as well!! 

Ingredients:
For the muffins:
makes approx 30mini muffins or approx 15 normal muffins
  • 80g butter, softened
  • 280g sugar
  • 1 package vanilla sugar (16g)
  • 240g flour
  • 1 sp baking powder
  • pinch of salt
  • 2 eggs
  • 240 ml milk
For the cream cheese frosting:
  • 250g mascarpone
  • 100g softened butter
  • 200g icing sugar

Preparation:
For the muffins: Preheat the oven to 175°CLine your mini muffin tin with paper liners.

In a mixing bowl beat together butter, sugars, salt until smooth and creamy. Keep steering and start adding eggs one by one, add milk and mix until all combines. Add flour and baking powder and whisk until all the ingredients combine. With a spoon scoop evenly into the prepared cupcake liners. Remember to fill the muffin cases only 3/4 cavity otherwise they might overflow. Bake for about 20min. You can check if the muffins are ready by sticking a cocktail stick into the centre of each muffin. It should come out clean and not sticky, if it is still sticky just leave it in the oven for 3-5 minutes more.

For the frosting: In a mixing bowl beat the butter, add mascarpone and beat all together, add sugar and beat again. Don't get scared if you see that the ingredients start separating from each other forming crumbles, just keep whisking. It might take a while but everything will combine don't worry! 

To decorate the cupcakes I have prepared the forget me not flowers from a rolled blue fondant then left over night to firm before I placed them on the cupcakes. For the frosting I used a piping bag, but if you don't have one you can use a knife spreading the frosting over the cupcakes. You can also decorate with small caramel candies or spread a bit of sea salt! Enjoy!!!


With all my love… <3


Sunday 15 June 2014

Apple Apricot Pie


I love apple pie but I wanted to tune it a bit and ad some summer touch! So I added some apricots! Their sweet and sour taste makes a perfect mach with apples. The dough is very delicate and crispy so every time you bit in the apple apricot filling will gently melt in your mouth. It is super easy and I am sure you will love it!

Ingredients:

For the pastry:
  • 250g of cold butter
  • 400g flour
  • 1 egg
  • 1 yolk
  • 150 g sugar
  • 1 small teaspoon of baking powder
  • 1 package of vanilla sugar
For the filling:
  • you can use 250ml prepared apple mouse or do it yourself from here: My mum's apple pie
  • 2 fresh apricots, cut in small cubes

Preparation:

You can make your pastry by hand, or simply pulse all the ingredients into a food processor. If making by hand, sieve the flour with the baking powder, sugars into a large mixing bowl. Add chopped butter and mix with your hands until the mixture resembles breadcrumbs. Add the egg and the yolk and gently work it together until you have a ball of pastry dough. Sprinkle a little flour over the pastry, then wrap it in cling film and pop it into the fridge to rest for 0.5h - 1 hour.

Preheat your oven to 180ºC. Take your cooled pastry out of the fridge. Prepare a pie dish around 28cm in diameter. Flour a clean surface and a rolling pin. Cut off the half of your pastry and put that aside. Roll the rest into a circle just over 1.5cm thick.  Put your pastry circle into the dish and push it into the sides. Take a fork and make some small holes in the pastry, then put the dish into the oven and prebake for about 15min. Take it out and cool down.

Take your apple mouse and the apricot cubes and pour into the prebaked pastry. Take the remaining half of the pastry and roll again over 1cm thick. With a knife cut the pastry into stripes, put them on the top of your apricot - apple mouse forming a chequered pattern.
Again put it into the oven and bake for another 30min until the top of the pie gets a nice golden color.

Bon appétit!!!


Thursday 8 May 2014

White Chocolate Almond Raspberry Sweet Rolls


Can you imagine starting your morning with these fluffy, sweet raspberry rolls?? Mmmm I love them! These are one of my favorites and I promise you once you try them you just can't stop eating! In general I love all yeast pastries just can't get enough of them! Yeast scares off many of you but believe me it is not that difficult as it sounds juts give it a try and you see you will be repeating this recipe!! The only downside of this recipe is that the rolls disappear in minutes!!! 

Ingredients:
For the dough:
  • 7g instant yeast
  • 100ml warm milk
  • 50g powder sugar
  • pinch of salt
  • 400g flour
  • 2 eggs
  • 2 yolks
  • 50g soft butter
For the filling:
  • 60g white chocolate, grated 
  • 40g almond flakes
  • 1 spoon vanilla sugar
  • 100g fresh or frozen raspberries

Preparation:
Prepare 22cm round tin. 
Mix together the milk and yeast and set aside for 10 minutes. Once the yeast has foamed up pour them to the mixing bowl of a stand mixer and add flour, sugar and the pinch of salt. Whisk all together. Start whisking and start adding eggs one by one, the same with the yolks. Mix on low speed using the dough hook or if you are patient and brave enough start knitting by hand :) Keep knitting around 15min and during the last 5min add the softened butter. Gradually add more flour, if needed, until the dough is elastic and does not stay stuck to the mixing bowl. The texture will be quite soft and elastic like a gum. Cover the dough with a tea towel and leave to rest for about 1 hour. The dough should double of its size. 
Remove the dough from the bowl and place on a floured surface. Roll out the dough into a 10x12 rectangle. Sprinkle the dough with the vanilla sugar, almonds and raspberries (if you are using frozen raspberries make sure you do not defrost them before, keep them frozen). Roll into a jelly roll shape. Slice into 2cm slices. Place in your prepared baking tin. You can use the remained egg white to brush your rolls, it will give them a delicate shine! 
Preheat the oven to 50ºC place your baking tin and leave it for 30min to rest again. You will see your rolls start growing again. Now amend the temperature to 180ºC and bake for 22min. 
I never glaze my rolls as I am to impatient to eat them so I just use powder sugar to sprinkle them a bit!!! 


that's the prepared dough and the rolls how they look before and after growing :)


...and the result is just Delicious!!! 


YUM, YUM, YUM!!


Wednesday 9 April 2014

Summer Strawberry Cake


I guess I really am in a strawberry mood!! Or maybe it is the summer mood…Strawberries will always remind me of warm and sunny days. I really can feel the summer coming soon when the days are longer and the mornings become pleasant even more when you can have a delicious strawberry cake for breakfast :) This recipe is probably the easiest I have even done and it is ready whiting few whisks and minutes! You can also use different fruits like berries or raspberries, any will make a great combination. Of course it is perfect not only for breakfast but also to accompany an afternoon tea!! 
Don't get scared as the dough comes out quite thick and this is to carry al the "heavy" strawberries so that they stay on the top of the cake. Enjoy! 

Ingredients:
  • 100 g butter
  • 130 g sugar
  • 1 large egg
  • 100ml buttermilk or milk, whatever you have in the fridge
  • 180g flour
  • 1 package instant vanilla pudding (40 g)
  • 1,5 tsp baking powder
  • 1 package vanilla sugar (16g)
  • as many strawberries as you can fit into your cake ;-)
Preparation: 

Preheat your oven to 180ºC. Prepare 22cm round tin. Beat butter together with the sugars either in the food processor or in a bowl with a whisk, until pale. Add the egg and keep whisking. When the ingredients have combined start adding buttermilk and all the dry ingredients, whisk until all combines again. 
Pour the mixture into the tin and place strawberries cutter in pieces (ith the cutter part upwards) and bake for 50min. You can check to see that it's ready by sticking a cocktail stick into the centre of the cake. It should come out clean and not sticky, if it is still sticky just leave it in the oven for 5-10 minutes more.


Sunday 6 April 2014

Skinny Strawberry Cheesecake


If you are constantly on a diet, like me, :) and you are worried about your hips but you can't live without sweets I have a perfect solution for you!!! This cheesecake is extremely aromatic and the strawberry smell is just crazy! The strawberry aroma will surround your kitchen from the first minutes of baking! A great spring recipe which will bring some sun to your house :)

Ingredients: 
For the bottom:
  • 1 cup of oatmeal or granola
  • 50g melted butter
  • 50g brown sugar - optional 
For the cheesecake:
  • 500 g low fat cheese (I used quark 01g fat)
  • 2 eggs
  • 110 g sugar
  • 1 package of vanilla instant pudding
  • 1 package vanilla sugar (16g)
  • 300g strawberries (you can use frozen strawberries in that case remember to not defrost them before)

Preparation:

Preheat the oven to 180ºC and prepare a 22-25cm round tin.

For the bottom: Mix the granola or oatmeal together with the melted butter and sugar and pour into the prepared tin. With a spoon or with your opened hand press the granola forming a flat surface. Put into the oven and bake for 15min. 
For the cheesecake: Take all your ingredients except the strawberries and combine  them together until you get a nice smooth texture. Note that we are adding the entire eggs to the mixture and we will not beat the egg whites separately.. Pour your cheese mixture into the tin, cut the strawberries into peaces and place them on the cheesecake gently pushing them into the mixture. Bake for approx. 60min. Before taking out of the oven leave to cool down for an hour and if you can resist put into the fridge and cool down over night. If you can't resist, like me, just bite in!!!!!